Icing Sugar Stencilling
For some light hearted stencilling fun and to create something that looks great – try a little Icing Sugar Stencilling and Cocoa Powder Stencilling. This is a great way to create some festive treats for eating immediately! Don’t be too much of a perfectionist – icing sugar goes where it wants to! But you can achieve some easy and quick results if you want to glam up some ginger biscuits, cup cakes or mince pies.
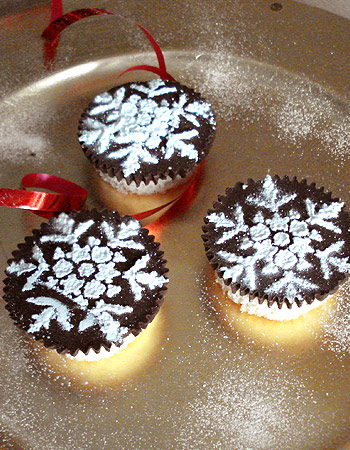
Who can resist chocolate cup cakes with added festive sweetness! Using our Little Snowflakes Stencil.
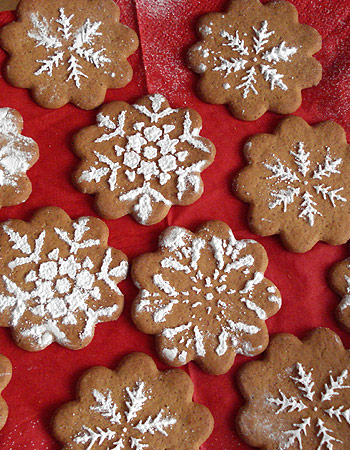
The Little Snowflakes Stencil gives you three designs to add to your ginger biscuit menu!
Try spreading some melted chocolate on a plain biscuit and then adding Icing Sugar Stencilling with our cute Nordic Snowflakes Stencil.
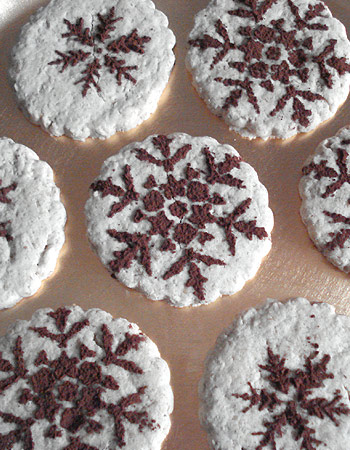
Cocoa Powder Stencilling – perfect for light coloured biscuits and cakes – we’ve used the Little Snowflakes Stencil again!
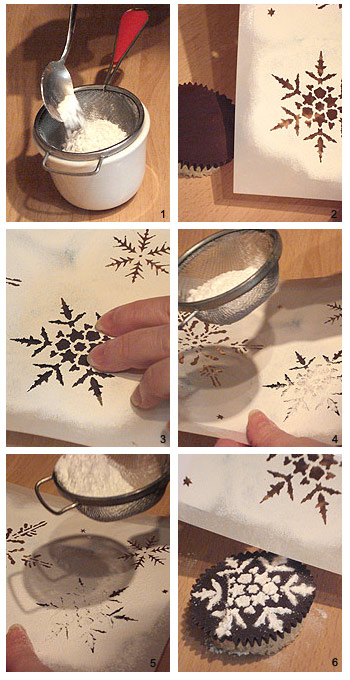
Step by Step Guide to Stencilling Cup Cakes and Mince Pies
Step 1 – Place a tea strainer over a small cup and fill with a teaspoon or two of Icing Sugar or Cocoa Powder. Keep the little sieve sitting over the cup when not in use to save getting Icing Sugar everywhere! Step 2 – Line the stencil up over the cup cake, looking through the cut out shapes of the stencil to ensure that the stencil is centred on the cup cake as much as possible – don’t worry if you get some slightly asymmetrical finished results – it all adds to the charm! Step 3 – Lay the stencil down and then carefully hold in place ready for the snow fall of the Icing Sugar! Step 4 and 5 – Very gently shake the Icing Sugar loaded sieve over the stencil, letting it fall over all of the cut out shapes of the stencil. This bit takes a little practice, to get the right control over the amount of Icing Sugar that falls. Keep the action light and repeat with a light dusting until the shapes are all covered. You may get a little snowy ‘dump’ though, which is all part of the trail and error and fun of this! Step 6 – With steady hands very carefully lift off the stencil taking great care not to smudge the delicate Icing Sugar Stencilling underneath – and don’t do this near an open gusty window! You can wash the stencil after use very gently in warm soapy water. We used our Little Snowflakes Stencil for this project.
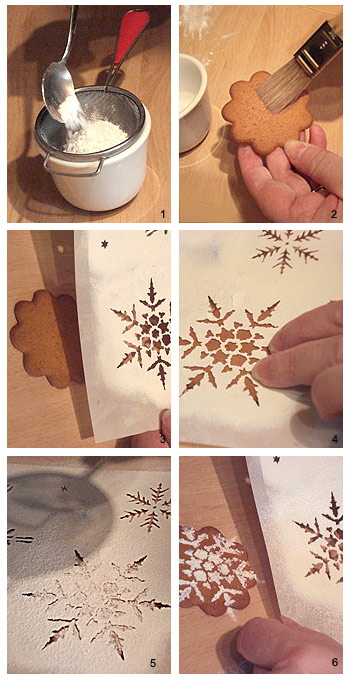
Step by Step Guide to Stencilling festive biscuits
Step 1 – Place a tea strainer over a small cup and fill with a teaspoon or two of Icing Sugar or Cocoa Powder. Keep the little sieve sitting over the cup when not in use to save getting Icing Sugar everywhere! Step 2 – Use a pastry brush dampened with a solution of water and Icing Sugar and lightly brush the top of the biscuit. This wetness will help the Icing Sugar to adhere to the surface of the biscuit and give slightly sharper edges to the finished result. Don’t put too much on or it will make the biscuit go soggy. Step 3 – Line the stencil up over the biscuit, looking through the cut out shapes of the stencil to ensure that the stencil is centred over the biscuit as much as possible – don’t worry if you get some slightly asymmetrical finished results – it all adds to the charm! Step 4 – Lay the stencil down and then carefully hold in place ready for the snow fall of the Icing Sugar! Step 5 – Very gently shake the Icing Sugar loaded sieve over the stencil, letting it fall over all of the cut out shapes of the stencil. This bit takes a little practice, to get the right control over the amount of Icing Sugar that falls. Keep the action light and repeat with a light dusting until the shapes are all covered. Step 6 – With steady hands very carefully lift off the stencil taking great care not to smudge the delicate Icing Sugar Stencilling underneath – and don’t do this near an open gusty window! You can wash the stencil after use very gently in warm soapy water. We used our Little Snowflakes Stencil for this project.
For Cocoa Powder Stencilling – firstly sweeten the Cocoa Powder by adding some Icing Sugar and mixing the dry ingredients well before stencilling. This will prevent any bitter after taste from the Cocoa. Follow the same steps as listed above, but take care to keep the dusting light as too much Cocoa can be a little dry in the mouth – it doesn’t have quite the same melt in the mouth quality as Icing Sugar!
